Create-a-Free-Blog — Part 3
Welcome back! In Part 2, we built your blog locally using Hugo. Today, we’re going to publish it live on the internet — completely free, and with zero ads — using GitHub and Netlify.
Let’s go live.
What You’ll Need
- A GitHub account (free)
- A Netlify account (also free)
- Your Hugo site folder (from Part 2). In this tutorial this folder is named
myblog - An internet connection
Create a GitHub Repository
GitHub will store your blog’s source code – everything inside your site folder will be pushed to a GitHub repository so that it’s accessible by a hosting site, in this case, Netlify. Here’s how to create a repository (repo).
- If you haven’t already, create a GitHub account. Log into GitHub, click the
+button, then click New repository.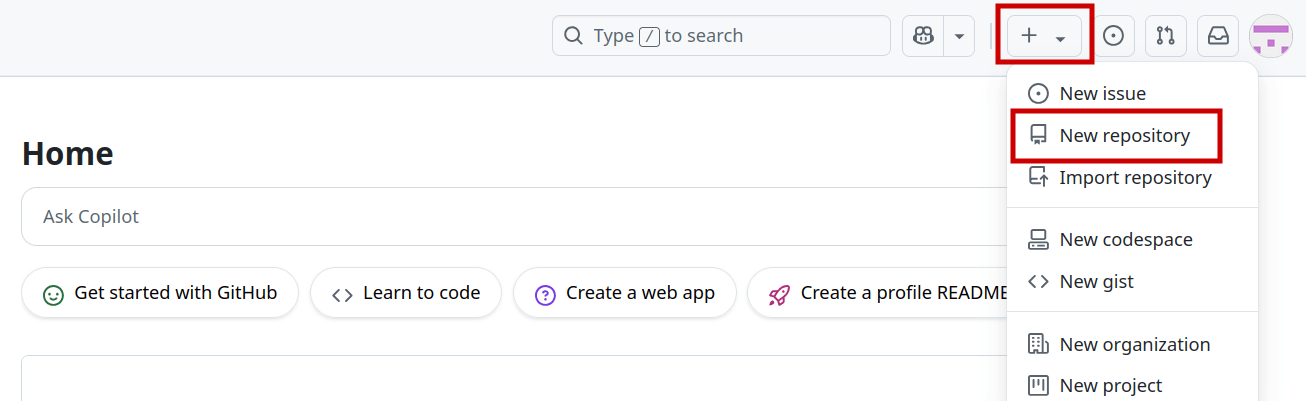
- Name it anything you’d like, in this tutorial the repository is named
myblog. Leave it public. - Add a description if you’d like. Leave all other settings blank.
- Click Create repository.
- Copy the HTTPS URL it gives you (e.g.
https://github.com/yourname/myblog.git).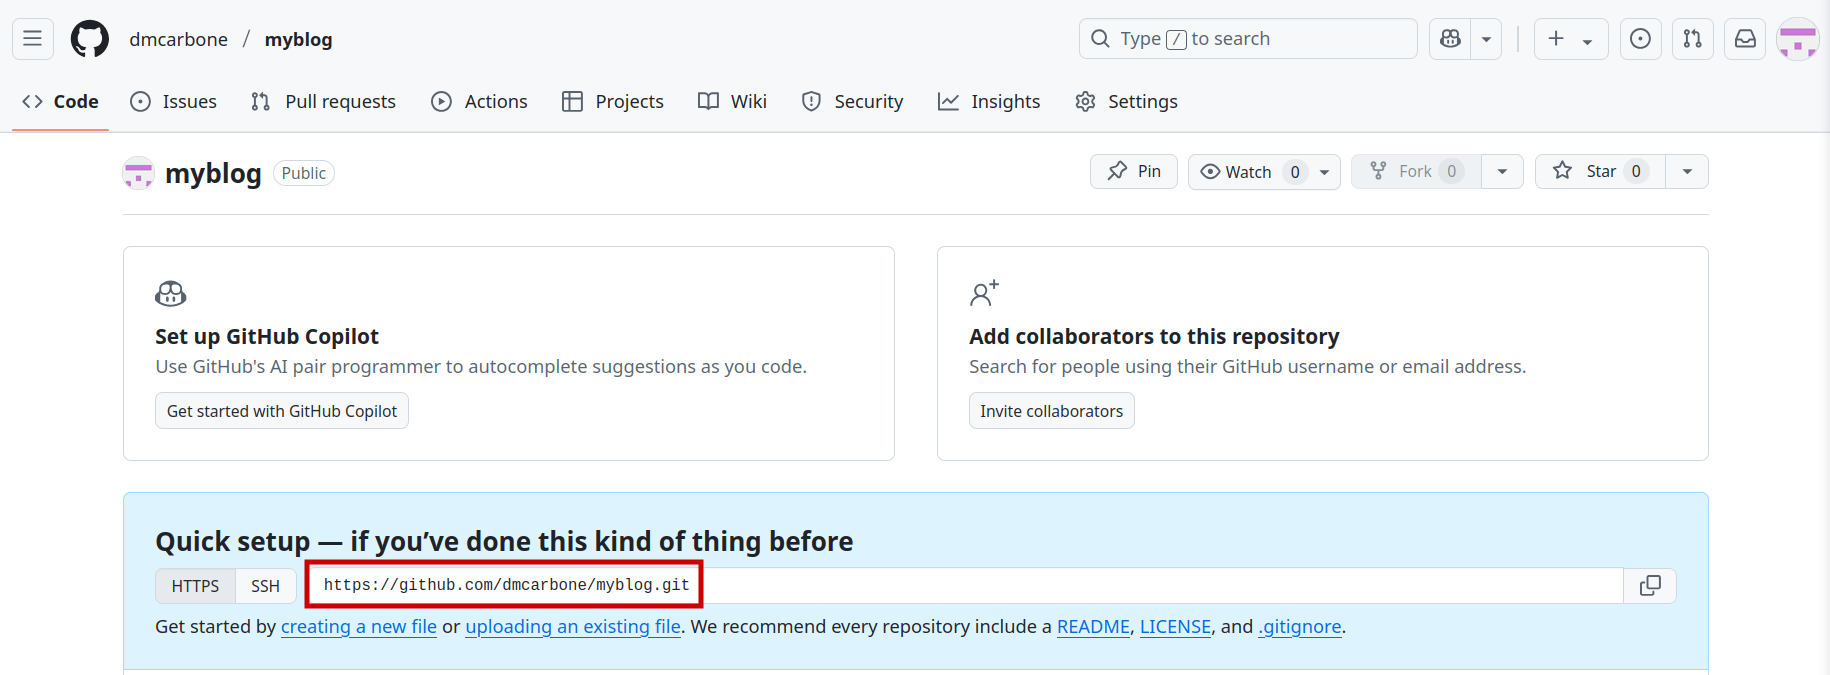
Initially Push Your Hugo Blog to GitHub
Locate your site folder and record the path – you’ll need this path frequently. Open a terminal and run cd followed by the path to your site folder. Here’s an example using myblog:
Your path might be structured a bit differently depending on your operating system. For example, Windows might begin with
C://....
cd /home/dan/Documents/website/myblog
Now run the below commands in terminal, replacing the URL with the HTTPS URL you obtained from your new GitHub repository. This sets the remote and branch, allowing you to push changes made on your local site files to your GitHub repo.
git add .
git commit -m "Initial commit"
git remote add origin https://github.com/yourname/myblog.git
git branch -M main
git push -u origin main
After setting the remote and branch, from now on you can edit your local files, then push the changes to GitHub by committing manually using VS Code. You’ll only need to touch the terminal to run your local server from now on!
How to Update Your Blog to GitHub Manually
Now that’s done, here’s the process you will follow to make future edits to your blog and push the changes to your GitHub repo. In the next section, we’ll use Netlify to publish live.
- Open your post from Part 2 in VS Code, edit the content (just add a few words) and save it. Now, on the pane on the left hand side of the screen, select the Source Control tab. See #1 in image below.
- Next, you should see the change you just made (and any other changes you’ve made as well) listed in the Changes section. Click the
+button to Stage Changes. Staging just tells Git what changes to include in the next commit – nothing is live just yet! There is also an option to Stage All Changes that appears when you hover over the Changes title. Doing this moves your changes into the Staged Changes area of the Source Control panel (see #2 in image below ). - To commit the changes and push them to your GitHub repo, enter a short message describing the changes you made. See #3.
- Click Publish Branch (see #4). This button will now appear as Commit the next time you wish to push a change to GitHub. Finally, click Sync Changes (this will appear after you publish branch or commit).

Your edits have now been synced to the GitHub repo. Now that you know how to make edits to your blog, you’re now ready to publish your blog live!
Deploy Your Blog on Netlify
Now let’s get it online with Netlify.
- Log into Netlify. You’ll need to create a team name.
- Click Add new project then Import an existing project.
- Choose GitHub and, if requested, authorize Netlify to access your account.
- Select your repository (ex.
myblog). Remember, the GitHub repo must be public. You can make this private, but we won’t cover that today. - In the next screen:
- Assign Team to the team you created initially.
- For Project name, use the name of your website, although you can name it anything, as long as it isn’t already taken. This will be used as the base of your URL. Ex.
learntechcafe-myblogbecomeshttps://learntechcafe-myblog.netlify.app. This can always be changed later if you change your mind. - Branch to deploy:
main - Build command:
hugo
- Publish directory: public
- Next, click Add environment variables. For Key enter
HUGO_VERSION. For Value you must get the Hugo version you are using from the terminal using the command below. It should look something like0.148.1.
hugo version- Leave all other settings as default.
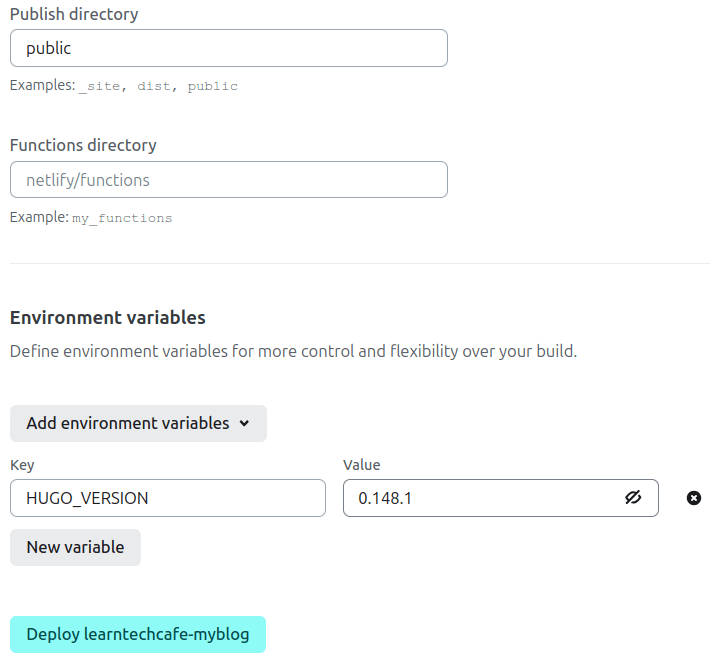
- Click Deploy Site. The site name should be the project name you chose.
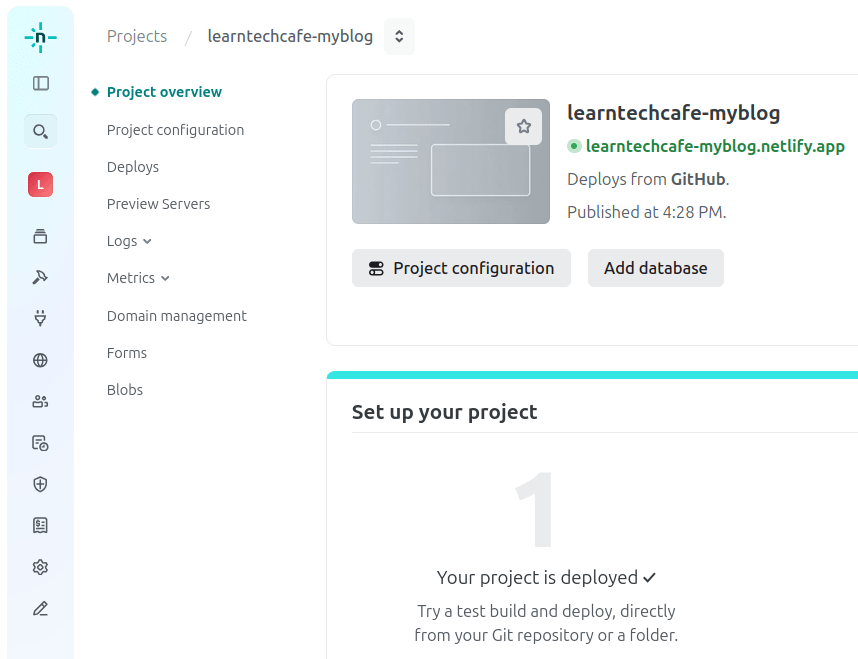
Wait a minute or two while Netlify builds your blog. When it’s done, you’ll get a public URL like:
https://your-site-name.netlify.app (ex. learntechcafe-myblog.netlify.app)
Open the link in your browser. Congrats — your blog is live!
Final Update to baseURL Parameter
Now that your blog is live, there is one last critical item left to update. You must update Your baseURL parameter in your site’s hugo.yaml file.
Tip: Setting the
baseURLparameter ensures that links work properly on the live site. If you don’t update this, your live site might show broken links or odd styling!
- Open
hugo.yamlin VS Code (located at the root of your site folder) - Change:
baseURL: ""tobaseURL: "https://your-site-name.netlify.app/" - Save and commit changes to GitHub
Done! Remember, from now on you can save your changes in VS Code, stage your changes, and push them to GitHub by committing your changes. You can always commit changes via the terminal, but I recommend using the VS Code interface as it’s easier for beginners to use.
Optional: Add a Custom Domain
Not a fan of the end of your URL (ex..netlify.app)? Want a custom domain like thisisthecoolestblogever.com? Unfortunately, you’ll have to pay for a custom domain. Luckily, most domain names will cost around $15–$20 CAD per year.
If you decide you want a custom domain, you must purchase a domain from a registrar (e.g., Namecheap, Google Domains, etc.). Or you can just use Netlify to purchase a domain:
- In Netlify, go to Domain management, then Production domains. Click Add a domain then Buy a new domain. Search for an available domain name, and enter your payment information to purchase. Your domain name will automatically be assigned to your new site (assuming you only have one project in Netlify so far).
Recap
You just:
- Created a GitHub repo and pushed your Hugo blog code
- Connected GitHub to Netlify to publish your site
- Updated your Hugo configuration in
hugo.yaml - (Optionally) set a custom domain
Your blog is now live – ready to share with the world!
Coming Up Next
In Part 4, we’ll cover how to write blog posts using Markdown, including:
- Headers, bold, italic
- Code blocks and inline code
- Links, images, and blockquotes
Have a question or want to show off your blog? 💬 Send us a message — we’d love to see what you’re working on!